Libro Iniciación a Ubuntu 16.04
After Installing Ubuntu
 You’re reading this post because you either plan to upgrade to Ubuntu 16.04 LTS or you already have — that makes you awesome!
But before you award yourself a well-earned pat on the back I heartily suggest you check out this list of the
top
16 things to do after installing Ubuntu 16.04 LTS.
You’ll find it jam-packed with
common-sense tips, nifty tweaks and helpful advice. It
doesn’t
matter if you’re a brand new Ubuntu user (welcome!) or an experienced
stalwart (how’s it going?) – you’ll find something of use.
Feel free to use the comments section at the bottom of this article to share you own post-install must-dos with other readers.
Ready to dive in?
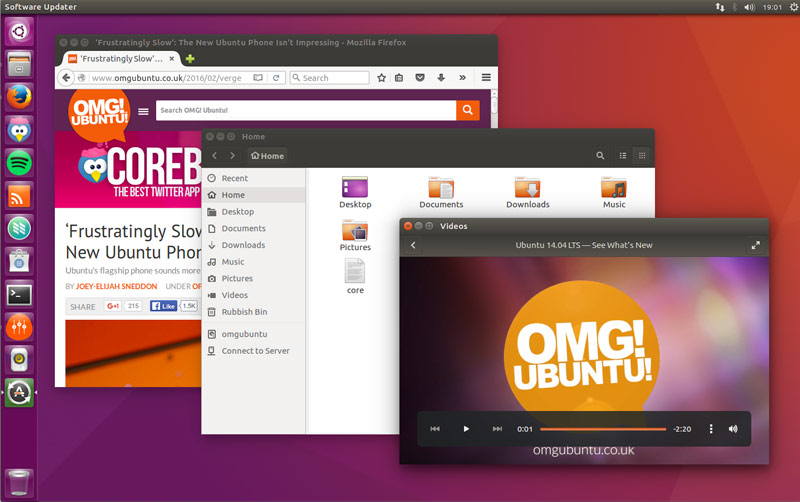
1. See What’s New in Ubuntu 16.04 LTS

New options! New apps! New kernel! New… everything!
Some exciting new changes feature in Ubuntu 16.04 LTS so be sure to
take a few minutes to familiarize yourself with what’s new and improved.
Whether you upgrade from 2014’s Ubuntu 14.04 LTS or waddle on up through the Wily Werewolf, you’re going to find the same
neat new features and apps on offer.
For example, if you’re doing a fresh install then the
Unity Dash no longer includes online search features by default. You will need to explicitly opt
-in to see web links, shopping results and other cruft in the Unity Dash. In earlier versions of Ubuntu you had to opt-
out.
Seasoned Ubuntu pros and fresh-faced newbies alike can peruse a
full list of all the natty new features in our release recap post:
2. Check for Any Last Minute Updates

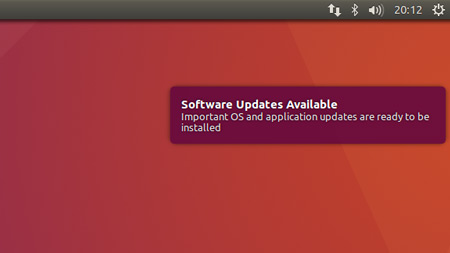
Update notification in Ubuntu 16.04
Now that you’re up to speed on what’s new, next step is to
check for updates.
Yes, I appreciate that this sounds like an odd thing to do after upgrading or installing but it’s important that you do it.
Firstly, not everyone is reading this list on release date. And even
if you are, a few last-minute security, stability or bug fixes may
have slipped out between the installation image being created and you
installing from it — bugs don’t stick to the same deadlines
that developers do!
How to
check for updates on Ubuntu:
- Launch the ‘Software Updater’ tool from the Unity Dash
- Click the button to check for updates
- Install (if needed)
3. Install Linux Graphics Drivers

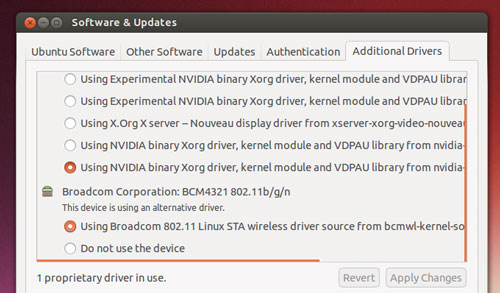
Install GPU drivers
Ubuntu supports most Nvidia and Intel graphics hardware out of the
box, giving you a choice of free, open-source drivers or proprietary,
closed-source drivers.
But to
get the best performance from your Ubuntu PC you will want to use the latest
proprietary graphics drivers available for your hardware.
Ubuntu makes it easy to do this, and you benefit from a
smoother Unity desktop experience as a result. You’ll squeeze higher
frame rates out of your favourite games, too. ;)
If you plan to
play the latest Steam games on Ubuntu or use GPU heavy apps like Blender you should install the latest proprietary Linux graphics drivers available for your hardware.
To do this:
- Open up the ‘Software & Updates’ tool from the Unity Dash
- Click the ‘Additional Drivers’ tab
- Follow any on-screen prompts to check for, install and apply any changes
Gamers using Nvidia hardware who are willing to trade a bit of stability for a whole lot of newness can use the
Nvidia Graphics PPA to install newer Nvidia Linux graphics drivers.
Those of you on Radeon device should be aware that the standard AMD driver is NOT SUPPORTED
in 16.04 at this time. A future point release is expected to bring
support for the new AMDGPU driver. Expect a regression in system
performance if you upgrade.
4. Install Media Codecs

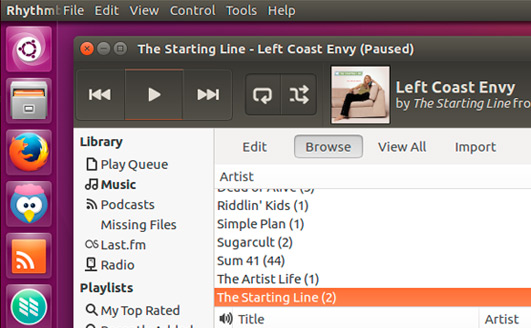
Playing MP3s in Rhythmbox
Legal issues stop Ubuntu from being able to play MP3, MP4 and other media files ‘out of the box’.
Ubuntu can play your audio and video files, you just have to tell it to do so.
The easiest way to do this is to check (tick) the ‘
Enable Restricted Formats‘ box during installation. This will install all the required multimedia codecs automatically, along with the OS itself.
If you forgot to do that (or upgrade from an earlier release) you can
install the multimedia codecs manually via the Software app:
5. Enable ‘Minimise on Click’

Click on an app launcher icon to open an app. Click on the same icon again to minimise the app. Intuitive, right?
That may be, but it is not the default behaviour in Unity — which can
be off-putting to new users. It’s also not obvious how to enable it.
Run the following command (or install/use Unity Tweak Tool > Unity > Launcher > Minimise):
gsettings set org.compiz.unityshell:/org/compiz/profiles/unity/plugins/unityshell/ launcher-minimize-window true
6. Move The Unity Launcher

Ubuntu positions its app launcher on the left-hand side of the desktop by default.
Ubuntu 16.04 finally lets you
choose where the Unity launcher is positioned.
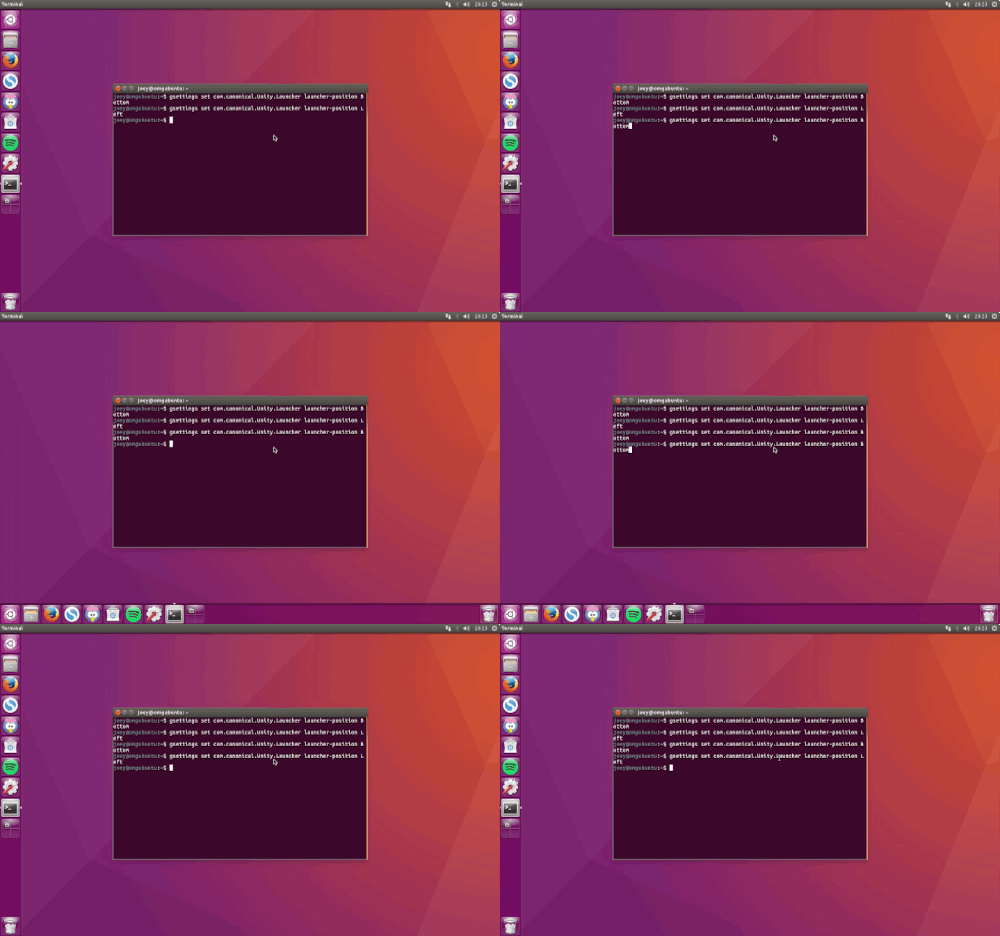
If you want to move the Unity launcher to the bottom of the screen
run the following command in a new Terminal (or install/use Unity Tweak
Tool > Unity > Launcher > Position):
gsettings set com.canonical.Unity.Launcher launcher-position Bottom
7. Install New GTK and Icon Themes

Ubuntu can be themed to suit your tastes
Ubuntu’s default look is nice enough, but it’s not to everyone’s tastes.
For those who switch to Ubuntu from Mac OS X, Windows 10 or a
different design-led Linux distro like elementary, the stock Ambiance
GTK theme and Ubuntu Mono icon set can seem humdrum and old-fashioned.
The good news is that
it is easy to make Ubuntu look fantastic. You can do this in a number of ways.
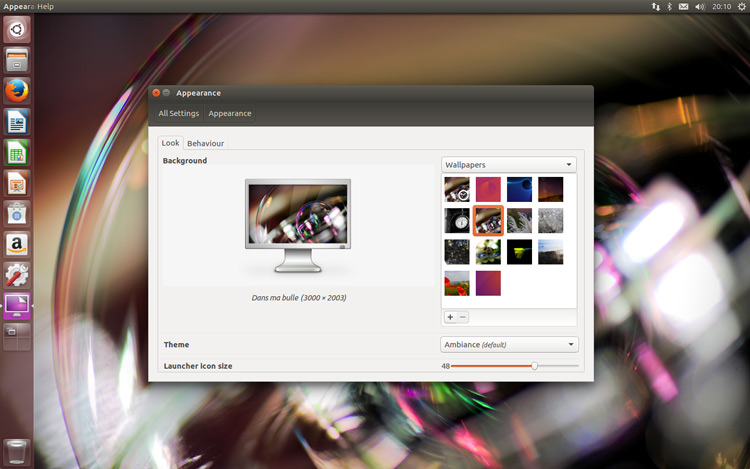
The ‘
Appearance‘ section in Ubuntu System Settings lets you adjust parts of the Ubuntu desktop to suit your needs, including:
- Change the desktop wallpaper
- Switch to a light theme
- Adjust the size of icons on the Unity launcher
For more customization options, be it changing the desktop font or choosing which side window controls appear, install the free
Unity Tweak Tool from
Software.
For a more thorough visual revamp you can
install new GTK and icon themes, like
our current favourite Arc.
Sift through our
Themes section to find other ‘eye candy’, including desktop wallpapers, widgets and cool apps.
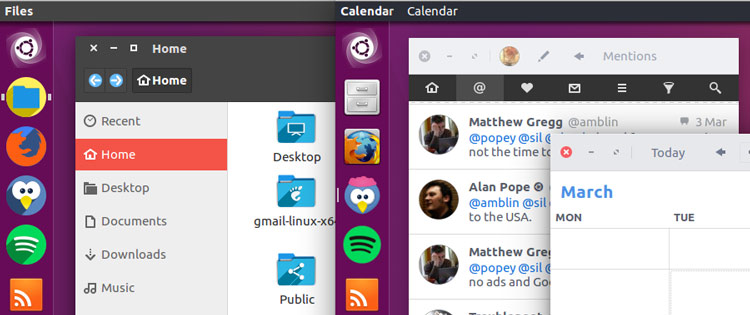
8. Decide Where App Menus Show Up

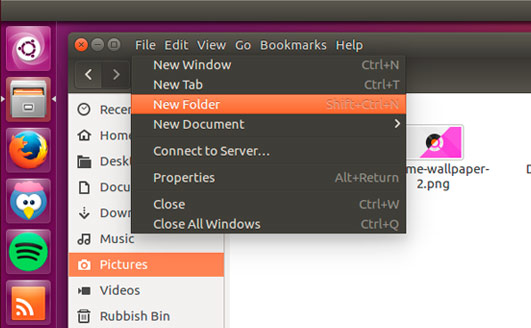
Do you prefer app menus to show in-app?
Application menus appear in Ubuntu’s top panel by default and auto-hide after a set several seconds.
A great way to save space, but also a great way to confuse.
When you’re using several apps it’s often hard to know which app the
‘Files’, ‘Edit’, etc. strip at the top of the screen belongs to — or
where they’ve suddenly vanished to!
Ubuntu provides options inside the
System Settings > Appearance pane that allow you to
choose where app menus appear.
If you’d rather see menus inside the window of the app they belong to:
- Go to ‘System Settings > Appearance’
- Select the ‘Behavior’ tab
- Find the section headed: ‘Show the Menus for a Window’
- Check (click) the circle next to ‘In the window’s title bar’
To make application menus ‘Always Show’:
- Go to ‘System Settings > Appearance’
- Select the ‘Behavior’ tab
- Find the section headed: ‘Menus visibility’
- Check (click) the circle next to ‘Always displayed’
9. Explore The New ‘Software’ Store

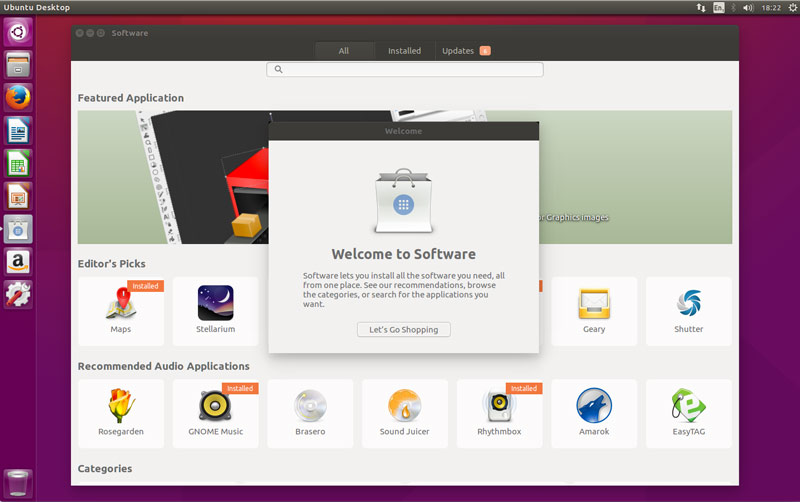
A new software store ships as part of Ubuntu 16.04 LTS.
Direct from the department of “
Long Overdue Changes”, this all-new app store replaces the Ubuntu Software Center which has shipped in every Ubuntu release
since Ubuntu 9.10!
‘Software’ (inspired name, right?) is a sleeker, snappier storefront letting you
browse,
install and
update apps. If you’re used to the old Software Center then be prepared to relearn a few tricks.
The ‘Software’ tool is host to thousands of free apps, including:
- Steam – Game distribution platform
- GIMP – Advanced image editor similar to Photoshop
- Corebird – Desktop Twitter client
- VLC – Versatile media player
- Chromium – Open-source web browser (differences)
- Skype¹ – VoIP service
- Shutter – Screenshot annotation tool
10. Install Your Favourite Apps

Not every app you wish to use is available to install through the new
Software tool. In fact, a wealth of awesome Linux software exists
outside of the main Ubuntu repositories.
You won’t find these in the Ubuntu software store. Easy-to-install
.Deb package downloads, which you double-click on to install, are
available for most of the following apps:
The official websites of the apps mentioned
are linked above to help you learn more about them and to download an
Ubuntu installer.
If you want even more awesome app suggestions why not bookmark our Apps section?
11. Sync Your Cloud Account(s)

Dropbox
You know that having a backup of your important files, folders and documents is super important.
Whether you prefer to pocket your personal files in Dropbox, OneDrive
or Google Drive, try to get everything in sync as soon as possible
after your install.
Most major cloud providers, excepting Apple iCloud, can be used on
Ubuntu. Some of these are easier to set up than others, though:
- Dropbox provides a native Linux client that is regularly updated
- OwnCloud lets you host your own personal cloud for ultimate control
- OneDrive is accessible through third-party scripts
- InSync offers unofficial Google Drive Linux support (for a fee)
Also keep in mind that not all of the apps listed integrate with Nautilus, the file manager used in Ubuntu.
12. Install Adobe Flash on Linux
Flash sucks, but for some sites you may not have the option of not using it.
Adobe officially stopped supporting Flash on Linux in 2012 and many web browsers are in the process of dropping support for its NPAPI architecture.
The overall best solution for using Flash on Linux is to download and use Google Chrome. Chrome comes with an
up-to-date version of the Flash plugin built-in. In fact it’s the only way to get the latest Flash player updates on Linux — and it’s a PPAPI plugin, too.
But I appreciate that not everyone wants to use Chrome. Some of you
may be using a 32-bit version of Ubuntu, which Chrome no longer
supports. Whatever the reason you need it, here’s how to get it:
If you want to watch Amazon Instant Video, Hulu or any other sites that uses DRM through HAL,
we’ve got a guide on that.
13. Supercharge The Unity Dash

A lone toggle
The Unity Dash is the hub of the OS. You can search, preview and open recent files, folders, installed apps and media content.
But it can do so much more if you ask it to.
How does checking the weather forecast without leaving your desktop
sound? What about sifting through Wikipedia articles, previewing music
on SoundCloud, or browsing eBay? All possible when you enable Unity’s
online search feature.
Head to the
Privacy & Security section of
System Settings. From there you can also:
- Enable online search features in the Unity Dash
- Choose which folders and files appear in the Dash
- Turn on/off automatic error reporting
14. Pick a Gnarly New Wallpaper

If the default wallpapers chosen for Ubuntu 16.04 LTS don’t quite meet your taste, feel free to change it.
The Xubuntu Community Wallpaper package from the Software store has a
collection of 10 high-resolution nature photographs, including a cute
nut-nibbling squirrel!
Check our
Wallpaper category for even more inspiration.
15. Install a System Cleaner
Caches and cruft accumulate as you use Ubuntu. To
keep your fresh install feeling, well, fresh you should do a bit of basic housekeeping from time to time.

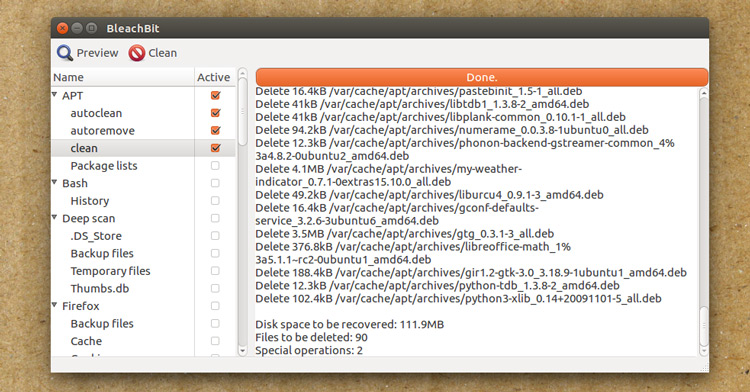
One of my favourite system cleaning apps is
BleachBit
(free, open source). BleachBit can tackle menial tasks, from clearing
your browser’s cache to deleting packages left over from installation,
all at the push of a button.
If you upgrade from an earlier version of Ubuntu using a system
cleaning tool (or command) is a foolproof way to claw back some precious
space. You’ll also keep your system running lean ‘n mean — which is
always bonus!
Just be careful about what you clean:
don’t remove anything you’re unsure of.
16. Tell Others About Ubuntu

If the 15 steps before this one are the bread, then this 16th idea is definitely the cheese! ;)
If you try Ubuntu 16.04 LTS and like it remember to
tell someone about it.
There are plenty of ways to tell other people about Ubuntu (and open-source software in general). You might:
- Burn a Live DVD/USB for someone you know to try
- Share what you like about it on social media and blogs
- Contribute to development by reporting bugs
- Wear an Ubuntu t-shirt or put Linux stickers on your laptops
- Join an Ubuntu LoCo team or Linux User Group
==========================================
Post-instalación de Ubuntu 14.04 LTS
Ubuntu 14.04 LTS
Trusty Tahr
fue lanzada el 17 de Abril de 2014. Es una distribución Gnu-Linux
basada en Debian y el Linux kernel 3.13.9. En esta versión de Ubuntu se
incluye el escritorio
Unity Shell basado en
Gnome 3.
A continuación indicamos comandos para utilizar en el terminal de
sistema. Para abrirlo podemos utilizar el siguiente atajo de teclas:
Ctrl+Alt+T
En el terminal pegaremos los comandos previamente copiados con la siguiente combinación de teclas:
Crtl+v
Para copiar texto del terminal, seleccionaremos con el ratón lo que queramos y luego la combinación de teclast:
Crtl+c
Empezamos por comprobar e instalar todas las actualizaciones disponibles:
sudo apt-get update && sudo apt-get upgrade
Formatos multimedia restringidos en Ubuntu 14.04
Existen numerosos formatos de audio y vídeo que no tienen licencia libre y que no vienen por defecto en
Ubuntu 14. Te explicamos como instalar
En la instalación incluiremos
Adobe Flash Player, multimedia codecs w32codecs o w64codecs, mp3-compatible encoding (
Lame),
FFMpeg, extra
Gstreamer codecs, y el paquete para decodificar
DVD (libdvdread4, ver información sobre libdvdcss2),
unrar archiver, odbc y cabextract.
También instalaremos otros formatos incluidos en las librerías
libavcodec-unstripped-52 y
libavutil-unstripped-49.
Si estas utilizando Ubuntu puedes hacer clic en el siguiente enlace para abrir el Software Center e iniciar la instalación:
ubuntu-restricted-extras package o abrir el terminal (Ctrl+Alt+t). Copia y luego pega en el terminal (Ctrl+v).
sudo apt-get install ubuntu-restricted-extras
Esto iniciará la descarga y posterior instalación de múltiples librerías, sigue las instrucciones en el terminal.
Tras finalizar la instalación seguiremos con la versión sin
restricciones de libavcodec . Esto instalará múltiples codecs para todos
los reproductores de audio y vídeo en Ubuntu.
sudo apt-get install libavcodec-extra
Reproducir DVD en Ubuntu 14.04
Si quieres ver películas en formato DVD deberás instalar CSS (Content
Scramble System). Además de la popular librería libdvdcss2 para
descifrar y cifrar en formato DVD.
sudo apt-get install libdvdread4
sudo /usr/share/doc/libdvdread4/install-css.sh
Habilitar el formato H.264 en Firefox y los correspondientes
repositorios de código para tenerlo actualizado con el Software Update
sudo add-apt-repository ppa:mc3man/trusty-media
sudo apt-get update
sudo apt-get install gstreamer0.10-ffmpeg
Rar y Zip for ubuntu 14.04
Para instalar los compresores de archivos Rar y Zip escribe lo
siguiente en el terminal. Se incluyen muchos otros formatos de
compresión
sudo apt-get install unace unrar zip unzip p7zip-full p7zip-rar sharutils rar uudeview mpack lha arj cabextract file-roller
Instalar Java en Ubuntu 14.04
La gran mayoría de usuarios solo precisan OpenJRE.
Copia los siguientes comandos en el terminal:
sudo apt-get install icedtea-7-plugin openjdk-7-jre
La versión para desarrolladores se instala con los siguientes comandos:
sudo apt-get install openjdk-7-jdk
Si necesitas las librerías de
Oracle Java 7 (JDK, JRE y el plugin)
sudo add-apt-repository ppa:webupd8team/java
sudo apt-get update
sudo apt-get install oracle-java7-installer
Mejorar la gestión de la batería del portátil con TPL
Para instalar TPL utiliza los siguientes comandos en el terminal:
sudo add-apt-repository ppa:linrunner/tlp
sudo apt-get update
sudo apt-get install tlp tlp-rdw
sudo tlp start